
This guide shows you how to add new custom fonts in WordPress. It’s a no-nonsense tutorial that explores the reasons why it’s often a good idea to break away from the built-in fonts.
Why Choose Custom Fonts?
System fonts are clean and easy to read, so why bother with the custom ones? The main reason is to stand out from competing sites. Companies use custom fonts for logo design and brand recognition because they’re different. Regular fonts are too recognisable for unique designs. Even subtle custom options can help bloggers and businesses develop more exclusive sites.
Text occupies large areas of most webpages and therefore helps to form first impressions. A custom font style is not always obvious at the conscious level, but it still matters.
Why Fancy Fonts Are a Bad Idea

Many new site owners get overenthusiastic with fancy designs. However, webpages that have too much going on are a turnoff for most visitors. Extravagant fonts are not easy on the eyes and may noticeably slow down page load times. The trick is to stick with two or three clean fonts maximum across your WordPress site or blog.
Web Font Pairing
Just because you like certain fonts, that doesn’t mean your site visitors will. It’s something to think about if you’re building a website to grow an audience. Visit FontPair if Web typography isn’t your thing. The site gives names and examples of fonts that work very well together.
Cost of Custom Fonts
Custom fonts used to be quite pricey but not now. We even have access to a plethora of free fonts today. You might want to check out download sites like fonts.com, Font Squirrel, and Google Fonts, to name three of several. Premium fonts—like all products with price tags—offer something more unique. Prices start from a few dollars to over $100.
Let’s explore a few of the free font options and how to install them in WordPress.
Google Free Fonts for Webmasters
Google easily offers the largest collection of free fonts in its massive library, so it’s a great place to start. WordPress plugins make font installation quick and easy. The one we’ll use is Google Fonts Typography, which comes with a useful Quickstart Guide for beginners. As with all plugins, make sure it’s compatible with your version of WordPress before you install it.
Log in to WP WordPress Dashboard.
Install and Activate the Google Fonts Typography plugin.
See our quick guide, How to Install New Plugins in WordPress if you need help.
Go to Appearance => Customise from the side menu.

This takes you to the theme’s live customiser preview interface.
Click the Google Fonts tab then Basic Settings.
You can change fonts from the font family dropdowns for Content, Headings, Buttons and Inputs. You can also see how each font looks in the Live Customiser Preview.
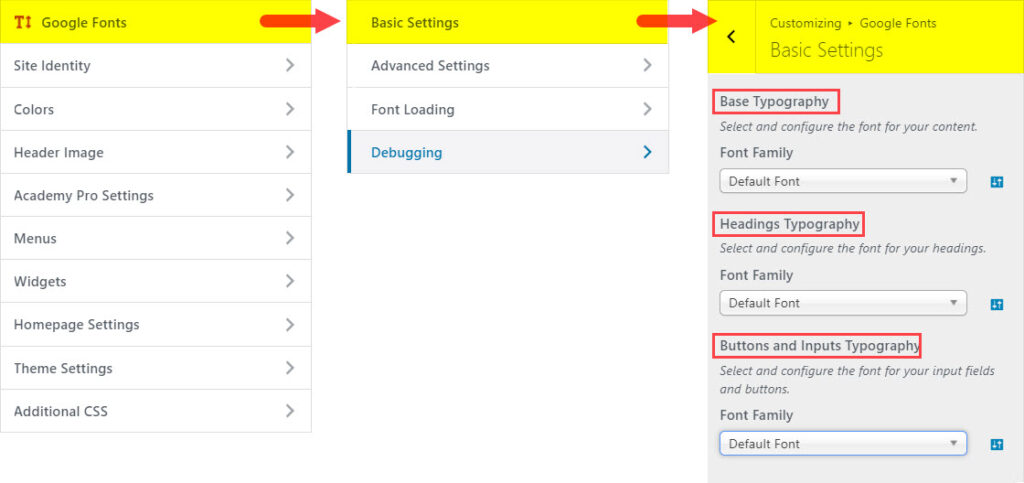
Nothing saves until you click the Publish button. If you don’t like the results, try other fonts or return to the Default Font in the dropdowns lists. There’s a lot to experiment with. Take your time to explore the font options or read the free Quick Start Guide for advice.
Google Fonts Typography is one of several font plugins, but they all work in a similar way.
Add Google Fonts Manually
You can also add Google fonts manually if you want to limit your number of active plugins. For this approach, you need to add code to your active theme’s header.php file.
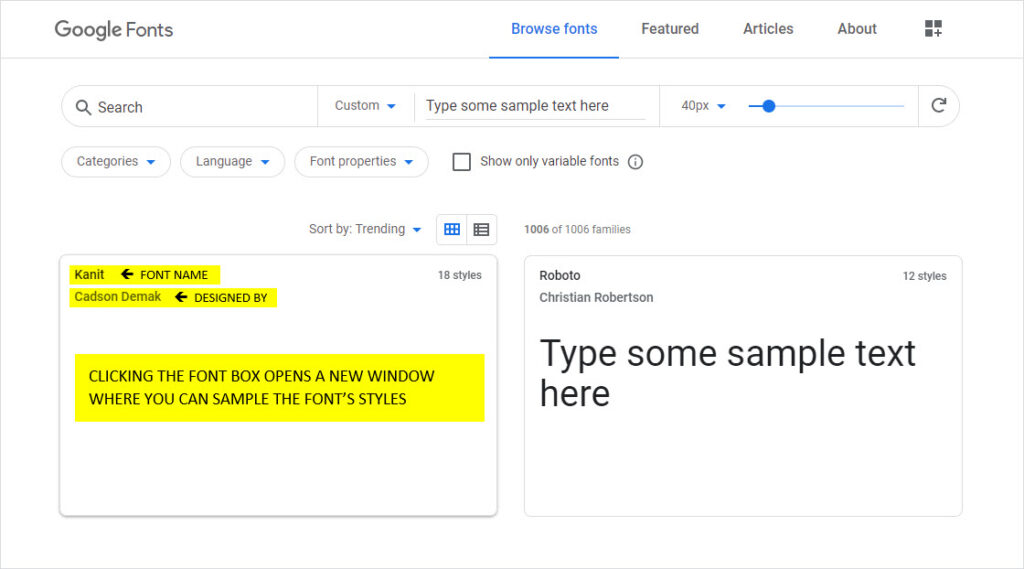
Visit Google Fonts. There you can search and sample the fonts from the home page.
Find something that interests you and click its box (this opens a new window).
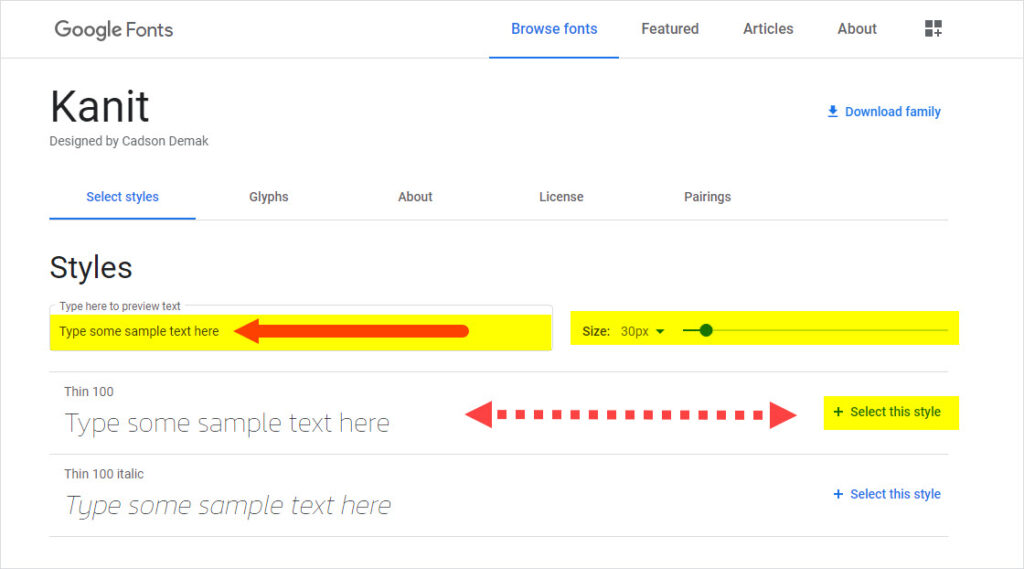
The font preview page displays all the available styles. You can type some sample text into the Styles box to see how each one looks. When you find one that interests you like, click the Select this style link to the right of the sample text.
Click the Embed tab (right) and copy the embed code.

Tip: Keep the font preview page open as you need to return to it later.
Edit the themes header.php file
Those with basic coding skills can paste the code into the active theme’s header.php file before the <body> tag. Go to the second option if you’re not comfortable working with theme files.
Add font code using a plugin
Adding Google font code is easy using the Insert Headers and Footers plugin by WPBeginner. Make sure this—or any other plugin you use—is compatible with your version of WordPress before installing it.
Install then Activate the Insert Headers and Footers plugin from the WP Dashboard.
See our quick guide, How to Install New Plugins in WordPress if you need help.
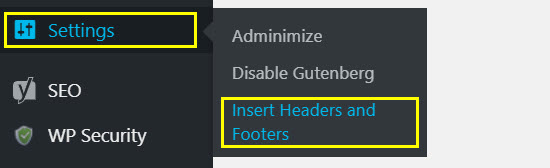
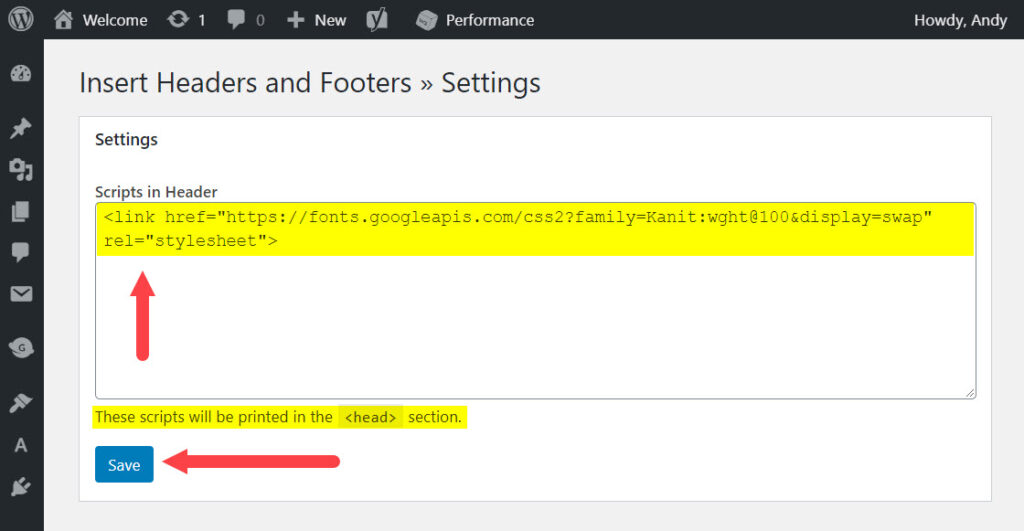
Next, go to Settings => Insert Headers and Footers from the side menu.
Paste your Google font embed code into the Scripts in Header box then click Save.
You can now use the chosen font in the active theme’s CSS stylesheet (see next).
Return to the font’s Embed tab in Google Fonts.
Copy the code from the CSS rules to specify families box (see image below).
Go to Appearance => Customise from the Dashboard side menu, and then:
- Click the Additional CSS tab
- Paste the font’s CSS rules into the Additional CSS box
- Click the Publish button

Add Custom Fonts Using Adobe Typekit

Typekit by Adobe has 1000s of impressive free and premium fonts for personal and commercial use. There’s full access to the entire library of fonts with all Creative Cloud subscriptions. You can browse the options from your web browser or in-app. The system uses a toggle switch to activate a font or family of fonts.
The free plan is limited, but worth trying if you want to explore some unique fonts. The site is well laid out, easy to navigate, and includes a ‘Getting Started’ tutorial as well as a User Guide.
Adding Typekit fonts to WordPress
Adding fonts to WordPress from Typekit is the same procedure as manually adding Google fonts.
There are two choices. One is to copy the font code and paste it into your themes header.php file before its <body> tag. Even easier is to use the Insert Headers and Footers plugin by WPBeginner. And the font’s CSS goes into the Additional CSS tab which you access from the theme’s live customiser interface.
See “Edit the themes header.php file” and “Add font code using a plugin” in the Google fonts section for guidance.
Add Custom Fonts Using CSS3 @font-face
A direct way to embed custom fonts into WordPress is to use the CSS3 @font-face method. This approach has no limits, meaning you can choose from all formats. The first step is to download the chosen font. If you like one that’s not in Web Open Font Format (WOFF), convert it using the online FontSquirrel Webfont Generator. You’re then ready to upload the new font to your server.
Upload new fonts using FTP
You can upload web fonts from the File Manager in your hosting account’s cPanel. Alternatively, use an FTP client like FileZilla or similar. First, create a new fonts folder in the directory (folder) of the parent or child theme. Once uploaded, it’s a simple case of adding the custom CSS code to the active theme’s stylesheet.
Add custom CSS font code
The easiest way to add custom CSS font code is from your theme’s live customiser interface.
Go to Appearance => Customise from the Dashboard side menu:
- Click the Additional CSS tab
- Copy the CSS3 @font-face rule below
(Replace the yellow highlighted site name, theme, and font text with your own)

3. Paste the CSS3 @font-face rule into the Additional CSS box
4. Click the Publish button
Closing Comments
Adding custom fonts to WordPress blogs or websites can help with branding. It also personalises the visual style and makes a site more unique. Finding and installing custom fonts into WordPress themes is free and easy. The best approach for beginners is to use one of several plugins. Alternatively, you can learn how to take the manual approach if you prefer.


