
Most WordPress blogs and content-rich websites allow visitors to leave comments. Some webmasters allow users to contribute further with articles. This guide explains the methods available on how to allow users to add posts to your WordPress site. Site owners still have full edit and moderation controls over the content, as they do with comments.
3 Benefits of Frontend Publishing
Frontend publishing lets other bloggers submit content to your site without logging into the backend. It’s an excellent way to get more unique content published on your website.
There are 5 main benefits of guest publishing for webmasters.
- Brings variety, knowledge, and different writing styles to topical blogging sites
- The above helps to gain new fans over time, thus boosting the site’s reputation
- More content updates to promote across social media and elsewhere
- More images get added to the site’s gallery
- Creates new business listings and develops the site’s professional network
Options for User Submitted Posts
There are three ways to allow user-generated content to your WordPress project. One exploits the built-in User features in WP Dashboard. The other two are plugins. Please read How to Install New Plugins in WordPress first if you’re unfamiliar with WP plugin installation.
#1 WordPress Built-in User Feature
Let’s begin with the built-in WordPress feature for user roles and user capabilities. This simple approach is perfect for sites that have multiple content contributors. It’s a member feature, so new authors must register with the site to submit content. They have restricted access to your WP admin area based on the user role.
Guest authors get to publish their written content directly from the WP editor. First, you need to allow new users to register with the site before anyone can do anything.
Go to Settings => General from the WP Dashboard side menu.

Scroll down the General Settings screen to the Membership section.
Put a tick in the Anyone can register box.
Now select Contributor from the ‘New User Default Role’ dropdown menu.

The WP Contributor user role
A WP contributor role allows users to submit posts on your website or blog. They can log into WordPress and create, edit, and delete their own unpublished work. They cannot edit or delete those posts once they’re live on the site, though.
You can read more about the 5 WP User Roles here.
Scroll down and click on Save Changes.

Users can now register on your WP site and submit their unique content. The admin area for this user role is minimal, only giving access to predefined capabilities.

The next step is to let visitors know that you now accept guest posts. For that, you need to add a visible login and registration area. The best and easiest way is with a sidebar widget.
Go to Appearance => Widgets from the Dashboard side menu.

Locate the Meta widget from the ‘Available Widgets’ area and drag it to your sidebar.

Click the Meta Widget in the sidebar to open its properties.
- Type a name for the new login options
- Click Save

You now need to log out so that you can view and test the Login and Registration links.
Here’s how the new options appear on the sidebar of our test site.

And here’s how the basic Registration screen looks.

All new users do to register is enter a username and email address. WordPress then sends an email registration confirmation link to complete the process. The user can then access the site via the Log In link and submit a new post as a site contributor.

This method gives users access to your admin area with contributor permissions.
Consider using a plugin instead, if:
- You prefer not to give unknown users access to the site’s backend
- You want a custom login form and feature for site contributors
A frontend feature is also simpler for guest posters unfamiliar with WP dashboard (see next).
#2 User Submitted Posts Plugin
The second option is the free User Submitted Posts plugin by Jeff Starr. It’s an ideal option for allowing visitors to submit posts and images at the site’s frontend. You can include this feature by adding a simple shortcode to any WordPress post, page, or widget-friendly area.
The customisable post submission form includes 12 input fields:
- User Name
- User Email
- URL
- New Post Title
- Post Tags
- Post Category
- Post Content
- Custom Field
- Challenge Question
- Google reCAPTCHA (v2 or v3)
- Post Images
- Agree to Terms
Install and activate the plugin, then ….
Go to Settings => User Submitted Posts from the Dashboard side menu.

You’re now at the plugin’s configuration screen.
Scroll down and click on Plugin Settings to open the options.

There are a lot of custom options to choose from. You can display or hide fields, control the number of image uploads, and the maximum image size. The way a form looks depends on the active theme and customisations, i.e., fields used and general settings.
Choose a default author
This plugin lets you assign a default author from the Users section. Consider assigning one author for all guest posters to keep things simple. That way, everyone has access to the same tools and user permissions from their login.

It’s time to add the new form to a WP post or page once you’re happy with the setup.
Scroll down to Display the Form on the plugin’s configuration screen.
There are several ways to add a form in this section.
We’ll use the shortcode for this example, so copy that to your clipboard.

Next, go to Pages => Add New from the Dashboard side menu.

Now let’s create the new form in a WP page.
- Add a title for your new form
- Put the cursor inside the editor and click the Add Block (+) icon
- Type Shortcode into the search box to reveal the block
- Click the Shortcode block

The previous action opens the simple shortcode block.
- Paste the shortcode copied earlier into the shortcode field (see image below)
- Click the Save Draft link
- Click the Preview link

Publish the page if you like how the new form looks and functions. If not, go back to the plugin’s configuration screen and make any changes as necessary. Once you’re happy, copy the link and point the new feature to your site visitors.
Here’s what the Submit Your Post looks like on our sample site.

Remember, how your form looks depends on the active theme and personal customisations.
#3 WPForms Premium (Paid) Plugin
WPForms Premium (paid) is a superb, multi-functional Drag-N-Drop Form Builder plugin. It’s a 100% responsive (mobile-friendly) tool with over 100 impressive templates. This plugin also allows guest posters to submit content from the frontend. You can set it up so that new users must register first, or allow unregistered users to post.
Every WP Form is super-easy to customise and adapt to the site owner’s needs. The plugin also comes with filters that let developers extend existing—or create new—custom functionality.
Install and Activate the WPForms Pro plugin from your WP Dashboard.

You’re now at the WPForms Screen, General Tab.
Add your License Key into the ‘Paste license key here’ field, then click the Connect button.
Don’t have your license key? Don’t worry; you can head over to your account on the WPForms website and get it from there.
Go to WPForms => Addons and click the Post Submission Form’s Install Addon button.
Click Activate to start using the addon.
Now go to WPForms => Add New from the Dashboard side menu.
Enter a name for your new form in the Form Name field.

Scroll down the page and click the Blog Post Submission Form to open the template.
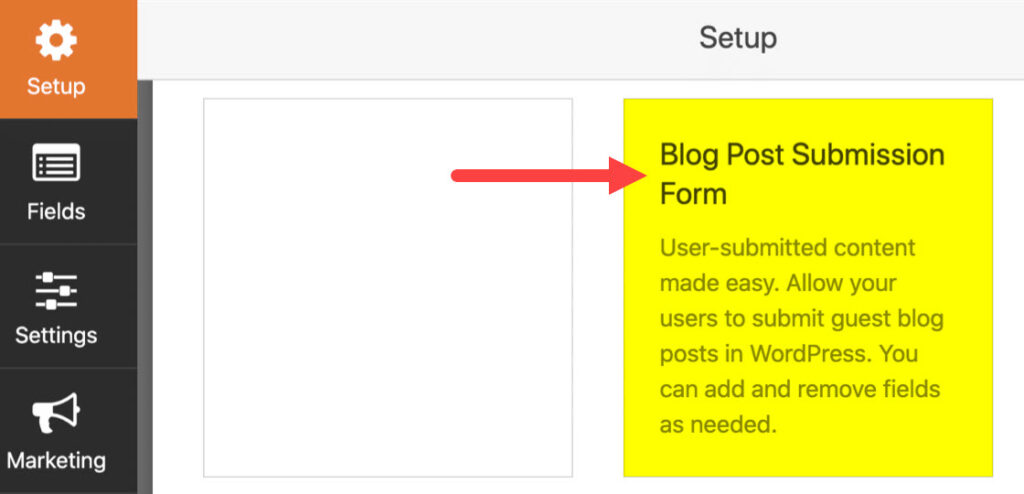
A basic submission form template opens with fields for ‘Author Details’ and ‘Create a Blog Post.’ You can customise it in any way you like using the available fields in the left column. Decide what permissions you want to grant guest posters. Examples are to add featured images, include post categories, and post excerpts. There are even custom fields if you need to be creative.

The settings for fields open when you click on them. It’s easy to undo anything on these forms, so enjoy experimenting with the available choices.
The general form options are:
- Enter a form name
- Add a form description
- Submit button text
- reCAPTCHA spam prevention
- Enable AJAX forms
- GDPR enhancements
Once you’re happy, click Settings => Post Submissions.

You can now map the form fields to those on your WordPress blog or website. Remember to click Save (top right) when you’re done.
Add the new form to WordPress
Your new User Submitted Post Form is ready, but it’s not live on WordPress yet. You have options to add to posts, pages, and widget-friendly sidebars and footers.
Let’s go ahead and add it to a new page with the help of WPForms.
Click the Embed button (top right)

Type a name for the new form on the next prompt, then click the Let’s Go button.

WPForms now creates a new page and embeds the form into it.
Click the Publish button if you’re OK with the new form. You can always return and tweak the look and function later if you need to.

That’s it. Users can now create new content for your site from the frontend.
It’s wise to moderate all new user-submitted content. WPForms sends an auto email notification to inform you of any newly submitted work by default.


